Indesit Washing Machine Error Codes & Diagnostic Test Mode
If your Indesit washing machine is not spinning, failing to drain, and flashing up error codes like F01, F02, or F05 you're in the right place. These intermittent faults can be frustrating, but often they point to a single, very common, and affordable component failure: worn motor carbon brushes.
This guide will walk you through how to confirm the fault using the machine’s built-in diagnostic mode and how to replace the brushes to get your washer running smoothly again. We'll be working on an Indesit XWD71252WUK washing machine, but this process is very similar for many Hotpoint and Indesit models.
Before You Begin: A Critical Safety Note Always unplug your washing machine from the mains electrical supply before removing any panels or attempting a repair. Your safety is the top priority. Also, ensure the drum is empty before starting any diagnostic tests.
Step 1: Confirm the Fault with Diagnostic Mode
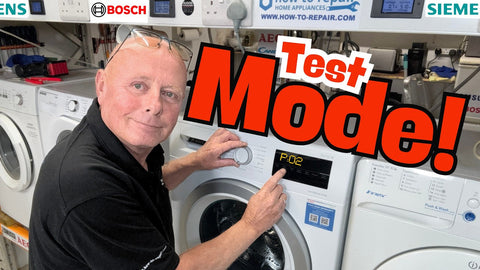
The first step is to ask the machine what's wrong. Entering the diagnostic test mode will force the machine to check its components and display a specific error code if a fault is detected. This procedure is time-sensitive, so you may need a couple of attempts to get it right.
To make it simple, think of your program dial as a clock face:
- The top position is 12 o'clock.
- The first program to the right is 1 o'clock.
- The second program is 2 o'clock.
- The 'Spin' program is usually at the 11 o'clock position.
To enter the test mode:
- Start with the machine off and the dial at the 12 o'clock position.
- Turn the machine ON, then turn the dial to the 1 o'clock position. Turn the machine OFF.
- Turn the dial back to the 12 o'clock position. Turn the machine ON, then turn the dial to the 2 o'clock position. Turn the machine OFF.
- Turn the dial back to the 12 o'clock position. Turn the machine ON, then turn the dial to the 11 o'clock (Spin) position.
- Press the Start/Pause button.
The display should show 'at' or something similar, indicating the auto-test has begun. The machine will now test its water valves, fill with water, engage the heater, and rotate the drum. It will then drain and attempt to spin. If a fault is found, an error code will appear. In our case, the machine showed an F02 error, confirming a motor circuit fault.
Step 2: Understanding the Error Codes
- F01 / F02 Error Code: These codes point directly to a fault in the motor circuit. On machines with brushed motors, this is almost always caused by worn-out carbon brushes. On newer brushless (induction) motors, it can indicate a faulty motor or a problem with the main circuit board.
- F05 Error Code: This code means the machine failed to drain within the allocated time. While it can be caused by a blockage in the pump or sump hose, it can also be triggered when a motor fault (like F01/F02) prevents the machine from spinning during the drain cycle.
- F06 Error Code: This error means the machine can't confirm the door is locked, usually due to a faulty door interlock or its wiring.
- F07 Error Code: F07 indicates a safety issue where the main board thinks the heater relay is stuck on, often pointing to a fault on the board itself.
- F08 Error Code: This fault appears when the machine's heater is on but the water isn't getting hotter, typically caused by a failed heating element.
- F09 Error Code: An F09 error points to a corrupted memory on the main control board, which often requires the board to be replaced.
- F11 Error Code: This code signifies an electrical issue with the drain pump where the main board can't detect it, usually due to a failed pump or bad wiring.
- F12 Error Code: F12 signals a communication breakdown between the main control board and the front display panel, often caused by a loose connecting cable.
- F13 Error Code: Exclusive to washer dryers, this fault points to a problem with the temperature sensor in the dryer's heating system.
- F15 Error Code: This is a critical error where the main board has lost control of the heater, almost always requiring a replacement control board.
- F16 Error Code: On top-loading machines, this indicates a fault with the sensor that confirms the drum is correctly positioned.
- F18 Error Code: Similar to F09, this is a firmware or data error on the main board that typically means the board needs to be replaced.
Since we have a combination of these codes, the motor is our primary suspect.
Step 3: Accessing and Replacing the Motor Brushes
Now for the hands-on part.
- Remove the Back Panel: With the machine unplugged, simply undo the screws holding the rear panel in place and set it aside, being careful of any sharp edges.
- Remove the Drive Belt: You'll see the large drum pulley and the smaller motor spindle below it. Ease the belt off the large pulley by rotating the pulley towards you while pulling the belt off.
- Unplug and Remove the Motor: First, disconnect the electrical block connector from the motor. It might be stiff, so be firm but careful. The motor is typically held in place by two 10mm bolts. Use a socket to remove these. The motor may be snug on its mounting lugs. Wiggle it forward and down to release it from the machine.
- Inspect the Carbon Brushes: You will see two plastic holders (the brush boxes) on opposite sides of the motor. A large amount of black carbon dust around the motor is a dead giveaway that the brushes are worn. Unscrew the two screws holding one of the carbon brushes in place and remove it. A worn brush will be very short, with little to no carbon left protruding from the holder. A new brush will have around 2-3 cm of carbon. If yours are worn, you've found the problem.
- Install the New Brushes: Disconnect the electrical spade terminal from the old brush and connect it to the new one. Carefully slide the new brush into the holder, ensuring the angled face of the carbon correctly meets the copper commutator on the motor shaft. Screw it securely in place and repeat for the other side.


Step 4: Reassembly and Final Test
Putting it all back together is the reverse of the disassembly.
- Slide the motor back onto its mounting lugs and secure it with the bolts.
- Reconnect the electrical plug and the earth wire.
- Loop the drive belt around the motor spindle first, then stretch it up and onto the large pulley wheel. Rotate the pulley a few times by hand to ensure the belt is seated correctly in the centre.
- Re-attach the back panel.
Before you run a full wash, plug the machine in and select a Spin Only cycle. The drum should begin to turn and ramp up to speed. This confirms the motor is now working correctly.
For a final check, run the full Diagnostic Mode again as described in Step 1. The machine should complete the entire test cycle without generating any errors and display 'END' on the screen.
If it does, congratulations! You've just saved yourself a costly repair bill and given your washing machine a new lease of life.
We hope this guide has given you the confidence to tackle a repair on your Indesit machine. For a full visual walkthrough, be sure to check out the video on our YouTube channel.
If you have any questions about your washing machine, please provide your brand, full model number which is written on the identification label, and a detailed description of the issue. Please visit our Contact Us page and make sure you fill out the request for what your problem is. A video shoot of the problem would be perfect as well.
If you found this guide helpful, consider supporting us by clicking on the Buy Paul a Beer link to help us continue making repair videos and guides.
Parts for This Model
Showing compatible parts for model XWD71252WUK