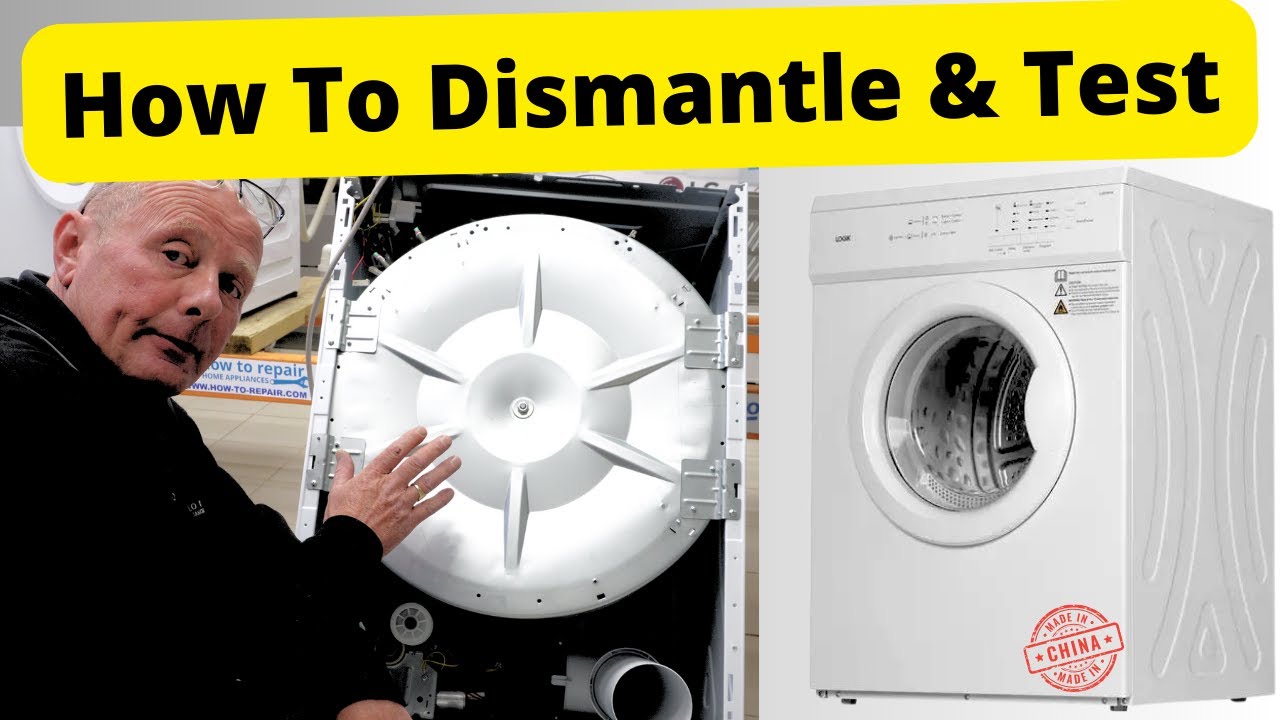
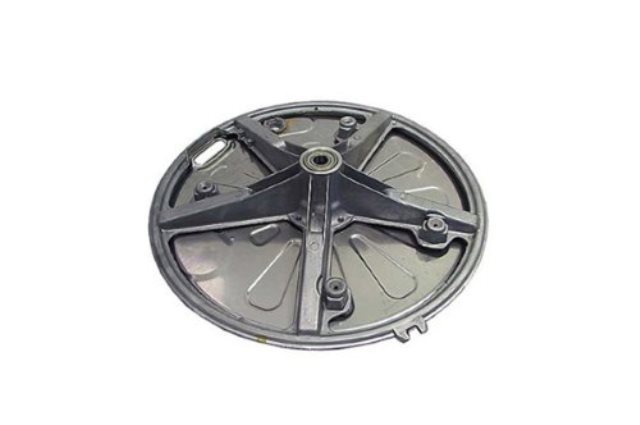
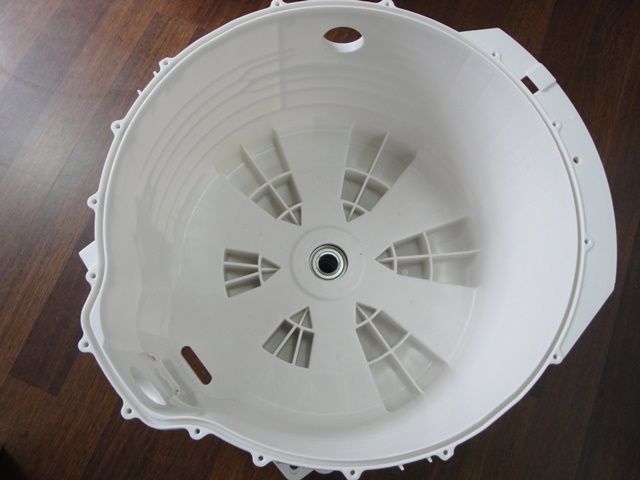
How to change bearings on a washing machine 1 of 4

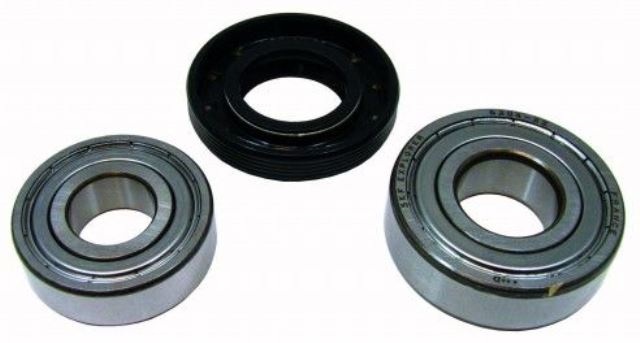
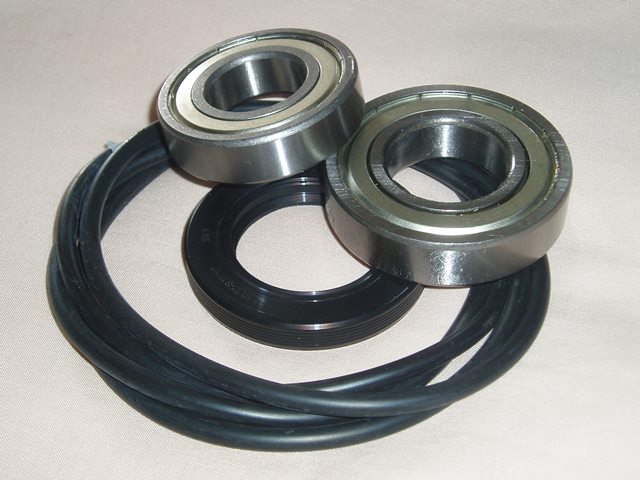
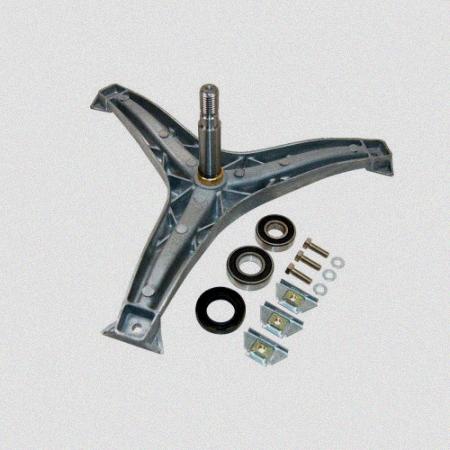
To order your washing machine drum bearings you will need your full model number. (This is normally around the washing machine door frame on a sticker)


Tagged under:
how to replace drum bearings, replace washing machine drum bearings, replacing washing machine drum bearings, washing machine drum bearings
10 Responses to “How to change bearings on a washing machine 1 of 4”


Thank you for the excellent advice. We will be able to do the repair.
Yours Jacqueline
I have just stripped down my washing machine to change the bearings only to find that it has the sealed drum set up you talk about , it’s a Lamona HJA 8514 only 4 years old . Gutted as now have to buy new machine , but would like to know that the next one I buy can have the bearings changed , so recommendations please . Do not want washer dryer , just washer.
Buy an older miele 900 series. EVERYTHING can be fixed with parts from germany…even the circuit board. When doing bearing PACK the SEAL with grease,otherwise you shorten the life of the bearings by a long time. In a Miele,they should last 15 years.
It was just a washer I wanted
Ralph,
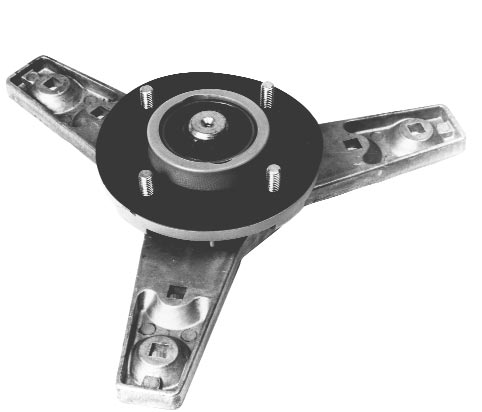
My washer is a Bosch WFF1401. Over 10-15 years old. Im on my second set of replacement bearings. Last changed about 5 years ago. Changing them today. Unusually it is the rear bearing that has worn, not the front one near the drum. It has as a spider back so I don’t need to removed the entire drum.
I suggest the Bosch type models are more repairable than the cheap bottoms price market models that are akin to disposables.
Bosch used to produce excellent machines but There standards have declined over the last few years since they have been putting welded drums in their new machines, Not on all models but a lot of them.
Appliances Engineer
Anybody got any advice or know of any guides on changing the bearings on a Hotpoint BWD12 washer/dryer please? It looks to me like I have to dismantle it to remove the spider. I’ve never done a washer before let alone a washer/dryer and whilst I aren’t scared of spiders, this looks scary!
I would like to fix it rather than replace as it hasn’t got a sealed drum and isn’t badly(I don’t think) calcified, considering it’s age. What bothers me most is replacing seals for parts I have to remove before I even get the spider off. An example is the heater setup. It looks as if I have to remove that just to get to the screw holding one arm of the spider on.
Any help or advice would be greatly appreciated. Thanks
I have an older Maytag front loader, how difficult are the bearings to change on that? I’m pretty handy but don’t want to tear it apart if it can’t be fixed.
We are only able to answer questions through the contact us page sorry
I have stripped our Electrolux front loader EW1080F to replace the bearings, the larger bearing is in. Now for the water seal, my question is how can you tell which side goes against the bearing.
Thanking you in advance.
Bob.