NEW REPAIR GUIDES

FORGOT YOUR DETAILS?

You can now ORDER wide range of new and second hand spare parts for your household.

How to replace & fit a Samsung washing machine door seal gasket

by / Thursday, 10 March 2022 / Published in Door Seals & Gaskets, Washing machines

Replace your Samsung washing machine door seal in 3 easy steps with our video guide.

Does your Samsung washing machine leak? The door seal may be damaged and need to be replaced. Our video guide shows you how to do it yourself in 3 easy steps, with two different methods to choose from.

This video will show you How to replace and fit a Samsung washing machine door seal, a replacement door seal gasket is not an expensive part on all Samsung Series 5 ecobubble, QuickDrive, direct drive, digital inverter, there are genuine and cheaper pattern gaskets available.
It is recommended to run the calibration after the washing machine seal has been replaced and I recommend doing it every 6 months see another video on this.


How to Replace a Samsung Washing Machine Door Seal

Introduction: Welcome to How to Repair! In today's tutorial, we'll guide you through the process of replacing the door seal on a Samsung washing machine. This procedure is applicable to both the new digital inverter or direct drive washing machines (6 to 10 kilo) and the older Samsung models with the eco bubble system (6 to 9 kilo). Before we dive into the repair, make sure you've disconnected the power from the washing machine for safety. We'll also mention some tools you'll need for this task: flat blade screwdrivers, Phillips screwdrivers, and a small socket set.

Step 1: Removing the Lid The first step is to remove the washing machine's lid. Locate the two screws at the back of the machine holding the lid in place. Remove these screws, and with a gentle wiggle, take the lid off and set it aside.

Step 2: Accessing the Door Seal Screws

  1. Open the soap door and locate two screws inside.
  2. Remove three screws at the top of the machine.
  3. There's also one screw that attaches to the soap door; remove it.

Remember to keep the screws in order, as they may have different threads going into plastic and steel. This prevents stripping the plastic threads.

Step 3: Removing the Door Lock

  1. Remove the two screws securing the door lock.
  2. Using a flat blade screwdriver, locate the spring and carefully pull the wire band or retaining clip away.
  3. Peel the door seal off the framework.

Step 4: Removing the Front Panel

  1. There are three screws at the bottom of the chassis; remove them.
  2. Gently remove the flap to access the screws beneath.
  3. Lift the facial panel and fold it onto the top. This exposes two screws at the top.
  4. There are plastic clips holding the panel in place. Carefully detach them.
  5. Use a small socket set if needed for tight screws.

Step 5: Detaching the Door Seal Now that the door seal is accessible, take note of this crucial tip. Washing machines are operating at lower temperatures nowadays, leading to the buildup of bacteria and mold. Perform a monthly maintenance wash to prevent this. Refer to the video linked below for detailed maintenance instructions.

  1. Clean the surfaces where the door seal attaches using a cleaning agent and a scouring pad.
  2. Ensure the surface is thoroughly cleaned before proceeding.

Step 6: Installing the New Door Seal Now, it's time to install the new door seal. Follow these steps carefully:

  1. Align the seal correctly. You can use a bit of detergent if needed, but doing it dry is recommended.
  2. Line up the drain point with the machine's drain point and fit the seal in.
  3. Adjust the top marker to the 12 o'clock position.
  4. Slowly and methodically peel the seal over the lip, ensuring it's securely in place.

Step 7: Reattaching the Retaining Band The retaining band for the seal is opposite to normal screws – you need to turn it clockwise to undo it. Make sure you follow this direction to avoid damaging the screw.

  1. Turn the band clockwise to loosen it.
  2. Once loose, lift the door seal upward and slide it away, then remove the band.

Step 8: Assembling the Washing Machine Now, let's put everything back together:

  1. Reattach the panel, ensuring the plastic clips align and securely click into place.
  2. Insert the screws at the top.
  3. Reinsert the three screws at the bottom.
  4. Secure the door lock with two screws.
  5. Put the soapbox back in place.
  6. Finish by securing the screws at the top, including the one inside the soapbox.

Step 9: Reattaching the Door Seal Retaining Band This step can be tricky, so it's helpful to have an extra pair of hands.

  1. Start at the top and work your way around, slowly letting the seal clip behind the outer rim on the panel.
  2. Once the seal is in place, use flat blade screwdrivers to stretch and attach the retaining band.

Step 10: Final Checks

  1. Make sure the seal isn't twisted anywhere.
  2. Check that all clips on the panel are firmly in place.
  3. Reinsert the pump flap if you removed it earlier.
  4. Close the door and ensure it's securely shut.

Step 11: Testing for Leaks Before you start a regular wash cycle, test for leaks:

  1. Place a piece of newspaper under the machine.
  2. Run a short wash cycle to ensure there are no leaks.

Conclusion: Congratulations, you've successfully replaced the door seal on your Samsung washing machine. Remember to perform regular maintenance washes to prevent mold and bacteria buildup. For more helpful tutorials and information on Samsung washing machines, check out the playlist at the end of this video or refer to the links in the video description. Thank you for watching, and don't forget to subscribe to our channel for more repair tips and guides. If you found this tutorial helpful, consider supporting our website by donating. Happy washing!

it is also worth doing a drum clean

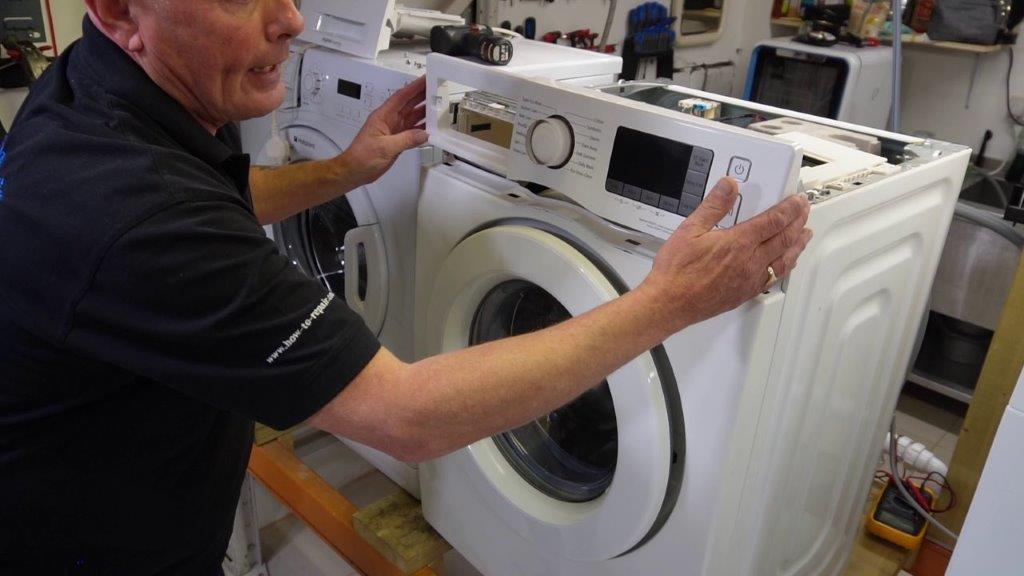
Remove lid,facia and front panel

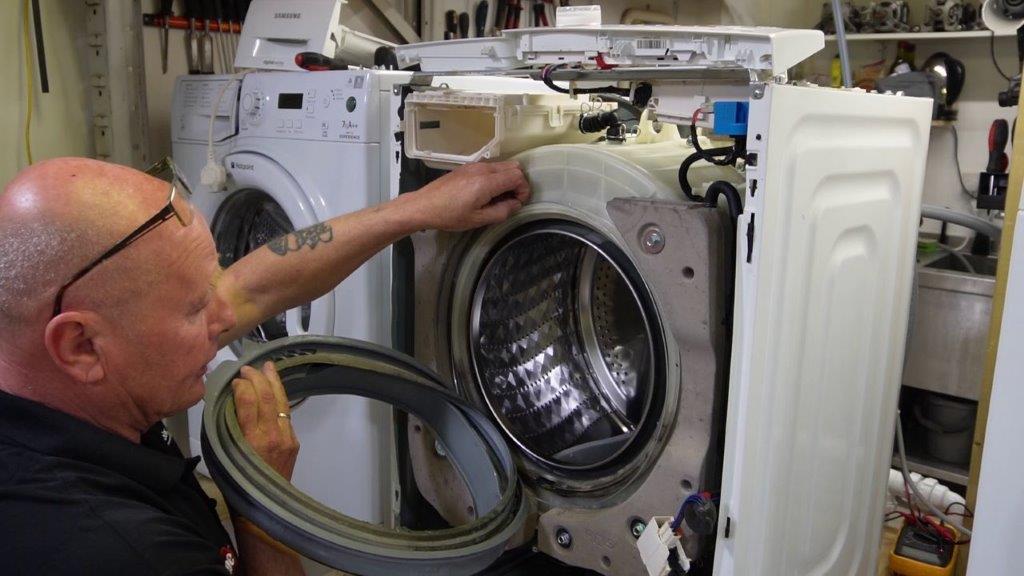
Remove seal and clean surface before fitting new one

Remove outer and inner bands on the seal
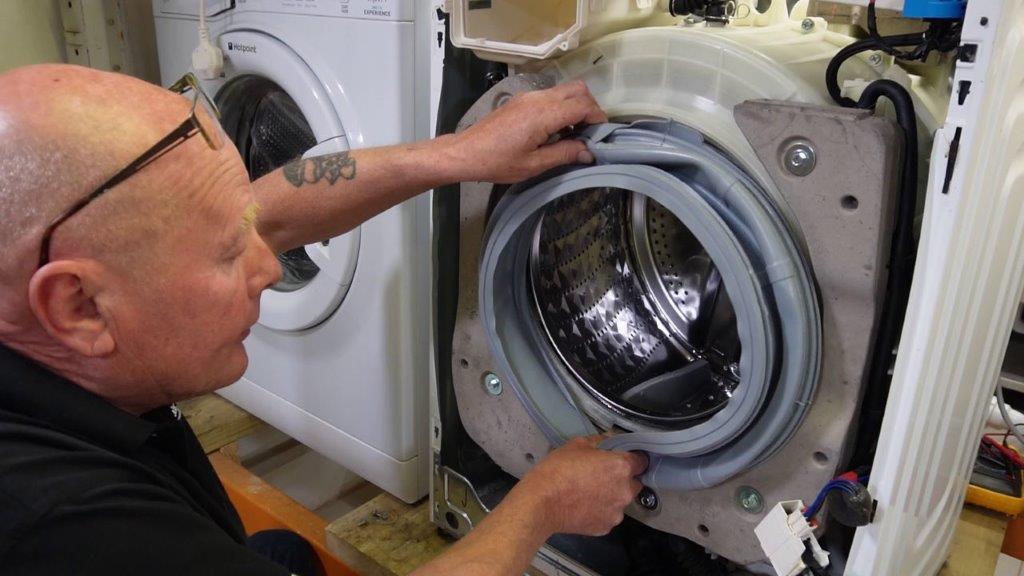
align drainage hole

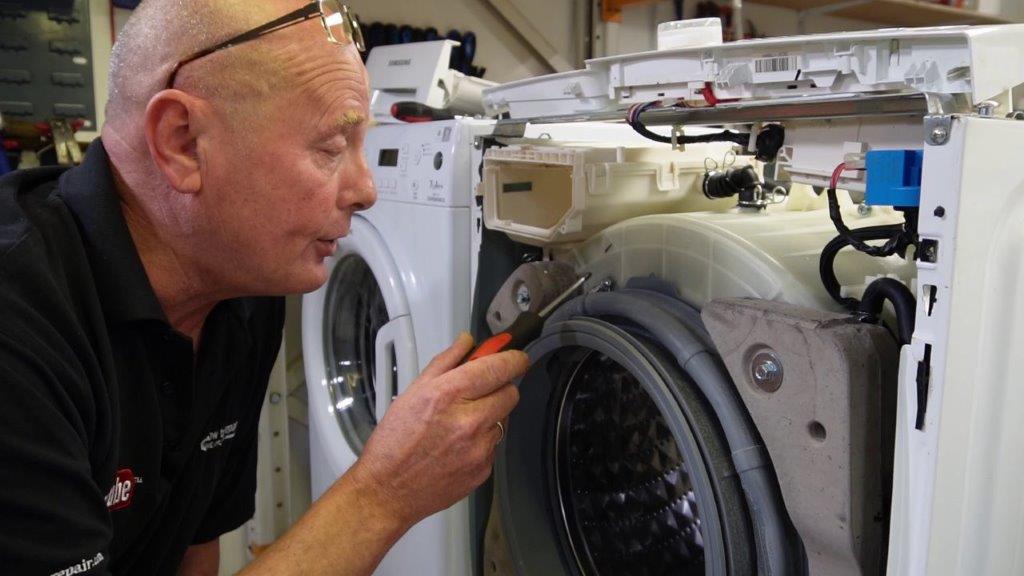
Samsung washing machine clips have an oppsite thread!!
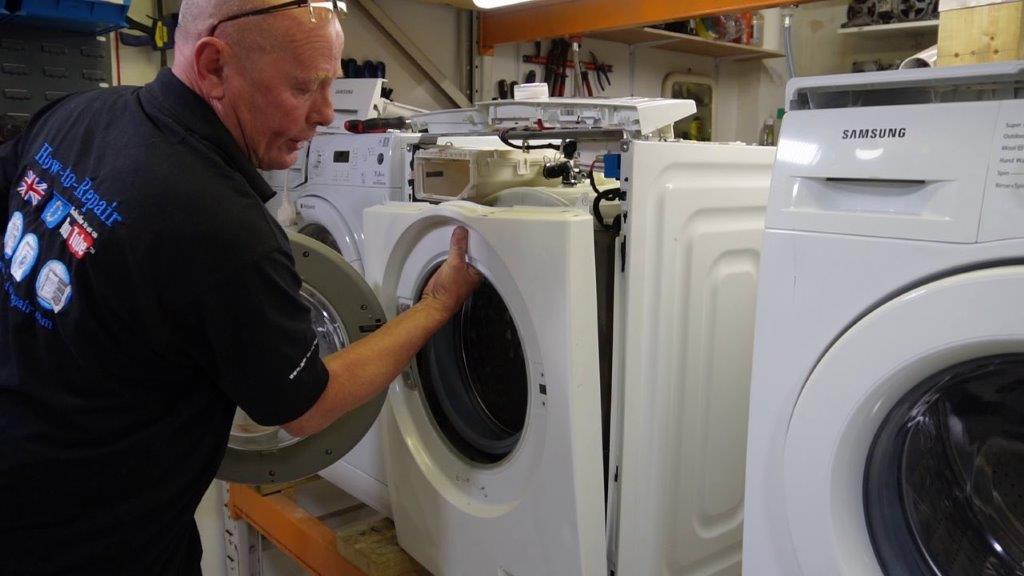
refit all panels


TOP