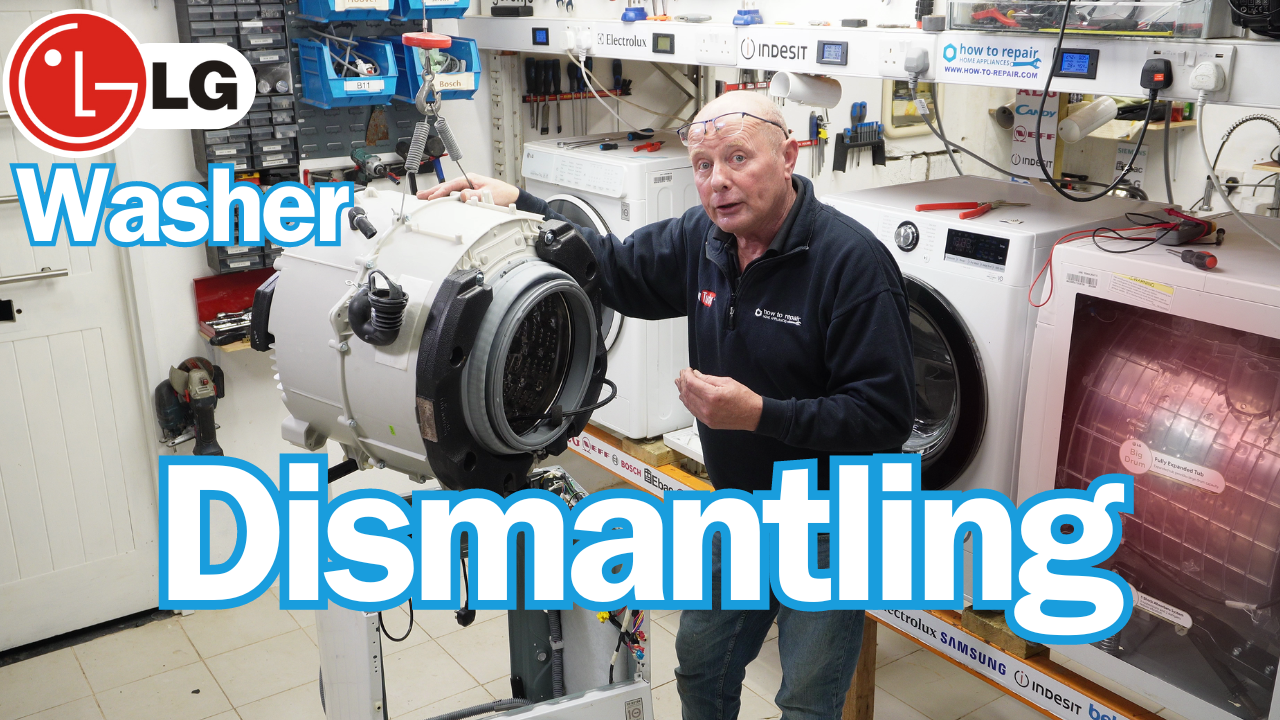
Dismantling Bosch Classixx washing machine fault finding, and how components work
How to Dismantle a Bosch classixx washing machine WAE24364: A Step-by-Step Guide, Dismantling and Troubleshooting
Bosch Classixx Washing Machine Repair Guide
Introduction:
Welcome to our comprehensive guide on repairing Bosch Classixx washing machines. In this detailed resource, we will walk you through the process of dismantling a Bosch Classic washing machine and addressing common issues that may arise during its lifespan. Whether you're a seasoned DIY enthusiast or a novice, our step-by-step instructions will help you troubleshoot and repair your appliance effectively.
Overview:
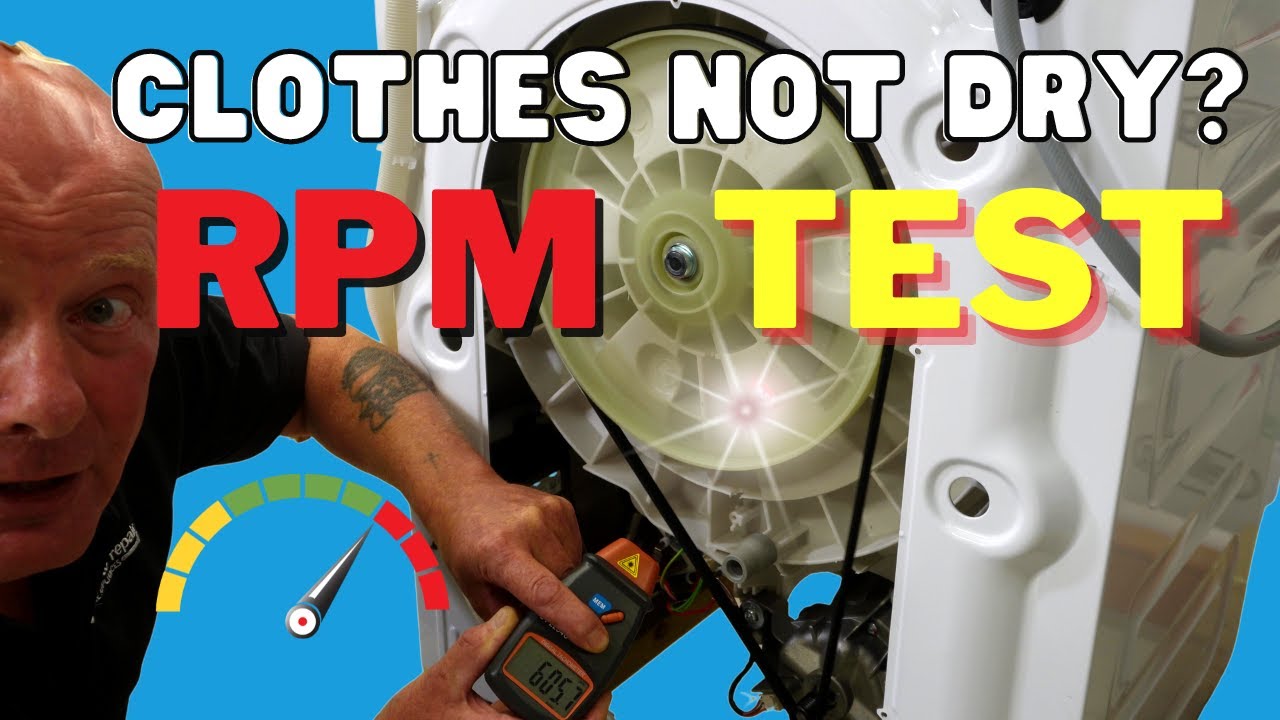
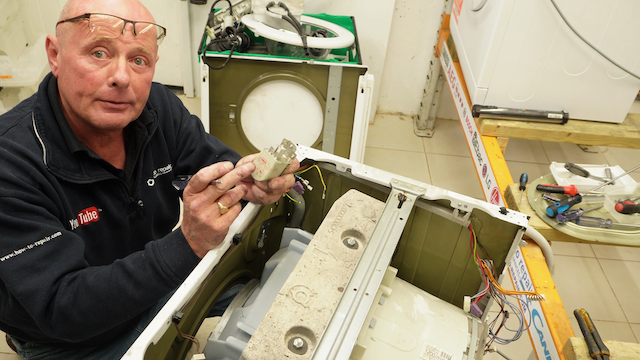
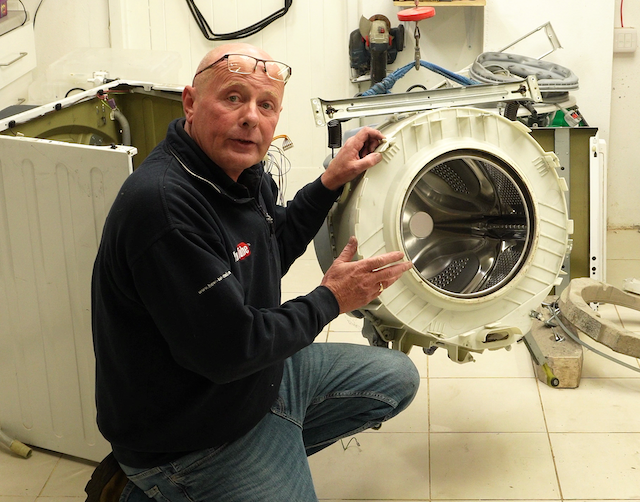
The Bosch Classic washing machine, available in 6, 7, and 8-kilo variants, was known for its robust build and design. However, even the best appliances can encounter problems over time. In this guide, we will address one of the most frequent issues with these machines: a cracked aluminum spider in the drum assembly. This flaw can lead to a disturbing noise during high-speed spins, as you can see in the video above.
Tools Needed:
Before embarking on this repair journey, ensure you have the following tools at your disposal:
- Screwdriver Set: For removing screws and dismantling components.
- Pliers: For handling hose clips and wires.
- Torx 10, 15, 20 Screwdriver: Essential for loosening specific screws.
- Spanner: To manage nuts and bolts.
- Hammer: For tapping and releasing pressure in some parts.
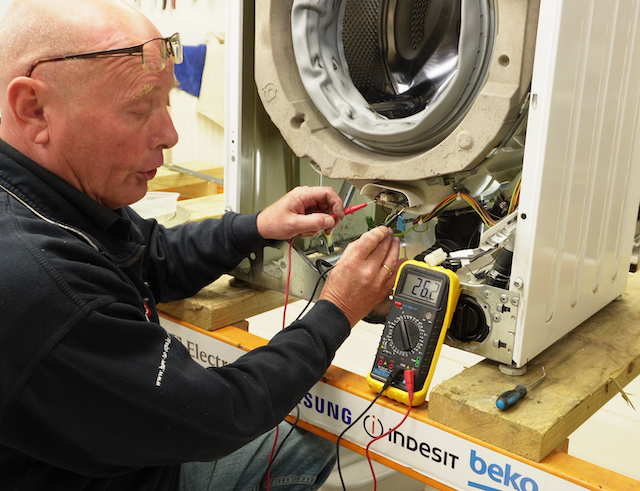
- Multimeter: To test elements like the heating element and NTC sensor.
- Insulation Tester (Megger): To check electrical resistance in the heating element. Only if you have a friend who owns one, as they can be expensive.
- Pin Pliers: Useful for delicate tasks like handling springs.
- Grips: For secure removal of clips.
- Travel Hoist (if available): To safely lift and move the drum. (A friend will do.)
- Cable Ties: For organizing wiring.
- Small Hook or Screwdriver: To release various clips and connectors.
Video Breakdown:
This guide covers a broad spectrum of tasks:
- Introduction: An overview of the Bosch Classixx washing machine and the common issue we'll be addressing.
- Dismantling: A step-by-step dismantling process, including removing the back panel, lid, belt, motor, and various components.
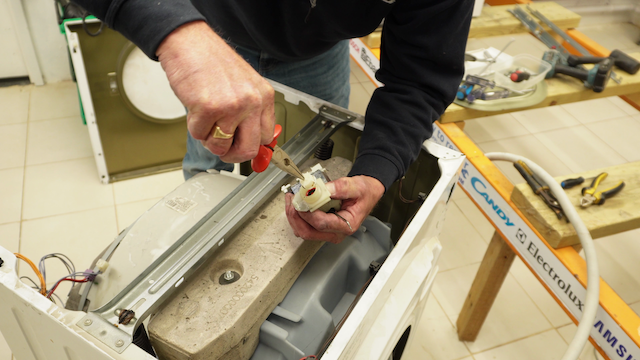
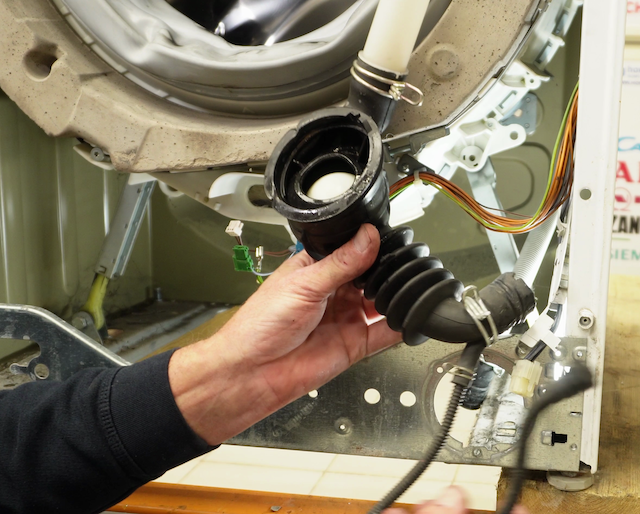
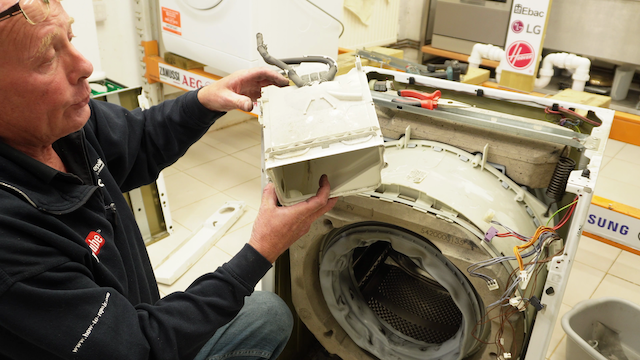
- Electrical Components: Explanation of the motor's wiring, testing the heating element, and discussion of the emptying and filling system, plus other components like the electrical filter/suppressor, suspension legs, printed circuit board, pressure sensor, and water valves.
- Water System: Analyzing water valve issues, pressure switches, and potential water backflow problems.
- Hose and Wiring Removal: Demonstrating how to remove hoses and wiring for reuse.
- Drum Splitting: Showing how to split the drum to access the spider and other components.
- Spider and Drum Inspection: Highlighting the damage to the spider and the importance of inspecting the drum.
Conclusion:
 Repairing your Bosch Classixx washing machine not only saves you money but also contributes to a greener planet by reducing waste. We encourage you to follow our step-by-step instructions and utilize the listed tools to address common problems with your appliance effectively. Remember, extending the lifespan of your appliances is a win-win situation—saving resources and your hard-earned cash.
Once you have understood which part is needed for your appliance, you can choose whether you wish to purchase a new or used part. On occasions when we do not have the parts that you require, here is a good technique to help you find the correct component for your machine.
Additionally, here are some useful tips if you are looking for a more expensive part like the printed circuit board or the motor or even the whole drum. It is worth searching shopping channels (eBay, Facebook marketplace, Gumtree, etc.) with your full model number to see if there are any other secondhand machines with a different type of problem. In other words, you can use one machine to repair another machine. It is also worth using the genuine part number to see if you can find ex-stock items from engineers or even unwanted parts on these shopping channels.
For additional resources, check out our other repair videos and exploded diagrams, all aimed at empowering you to take control of your appliance maintenance. Thank you for choosing sustainability and practicality by opting for DIY repair.
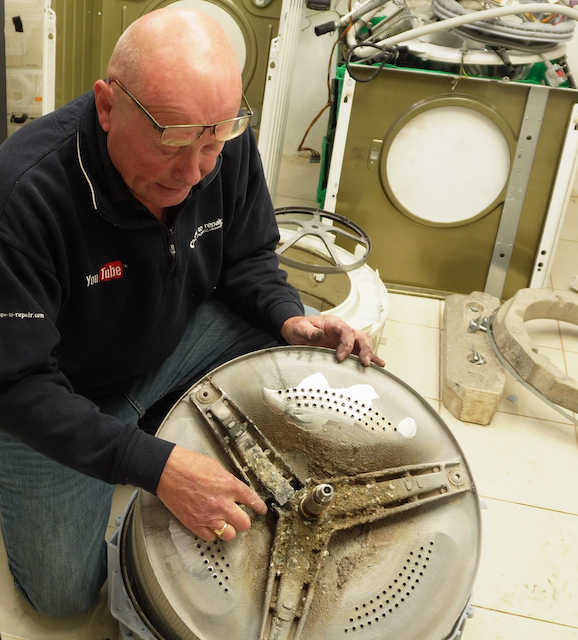 In this video, we explore a Bosch classic washing machine and address the issue of its aluminum spider developing a hairline fracture. This problem makes it uneconomical to repair the appliance. We will take this opportunity to disassemble the machine and demonstrate common problems that can occur in such machines.
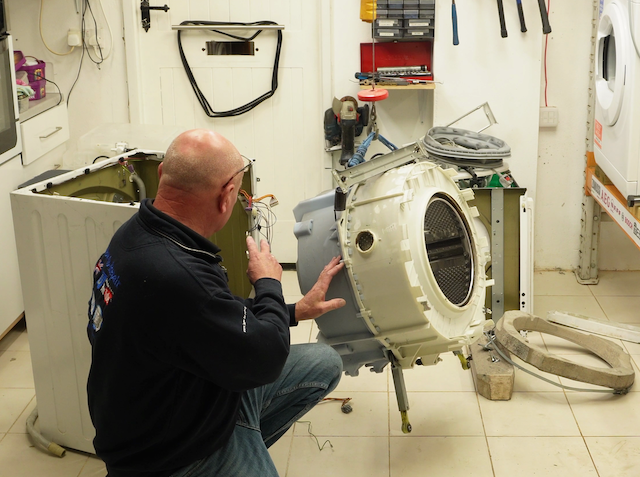
We will begin by explaining how the drainage system functions in the washing machine. It starts with water leaving the drum and flowing through the sump hose, then entering the pump. The pump pressurizes the water, forcing it through the waste hose and out of the machine into your drainage system.
Additionally, we will illustrate how the water inlet system operates. Water enters the machine from your tap through the water valve, then travels into the soap box and through the soap drawer hose into the drum. Inside the drum, the water is measured by the pressure switch, which informs the program when to activate or deactivate the water valve based on the required water level in the machine.
We will also examine the heating circuit and common issues that can prevent the machine from reaching its desired temperature during the wash cycle, or it may not heat at all. There are multiple faults that can lead to these problems, ranging from faulty heating elements to NTC sensors, or even an electrical relay on the main circuit board. Understanding what is happening is crucial for diagnosing which component is faulty. This knowledge can also help when dealing with issues like tripping the electrical circuit in your house, which can sometimes be as simple as a faulty heating element.
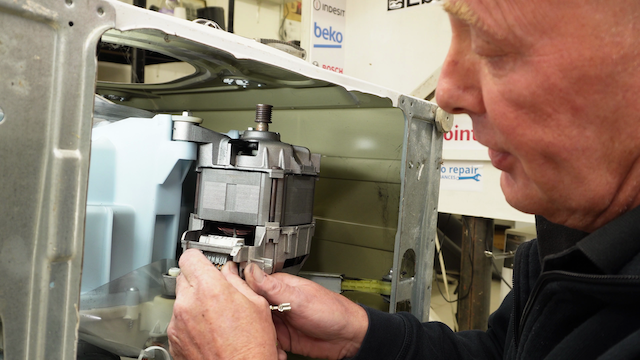 We will also show you how to remove the washing machine motor inspect the carbon brushes and understand the wiring going to the motor. There are also thermal cut out in motor windings which sometimes can become faulty, but you can see all that in another detailed video on how to test Bosch motors.
Understanding how the drum is attached to this Bosch washing machine is a vital step in learning how to remove it effectively. The video will guide you through the process of removing each component necessary to lift the drum out of the machine. This will allow you to determine whether you only need a new set of bearings, a new spider along with bearings, or in some extreme cases, a complete drum replacement.

![]()
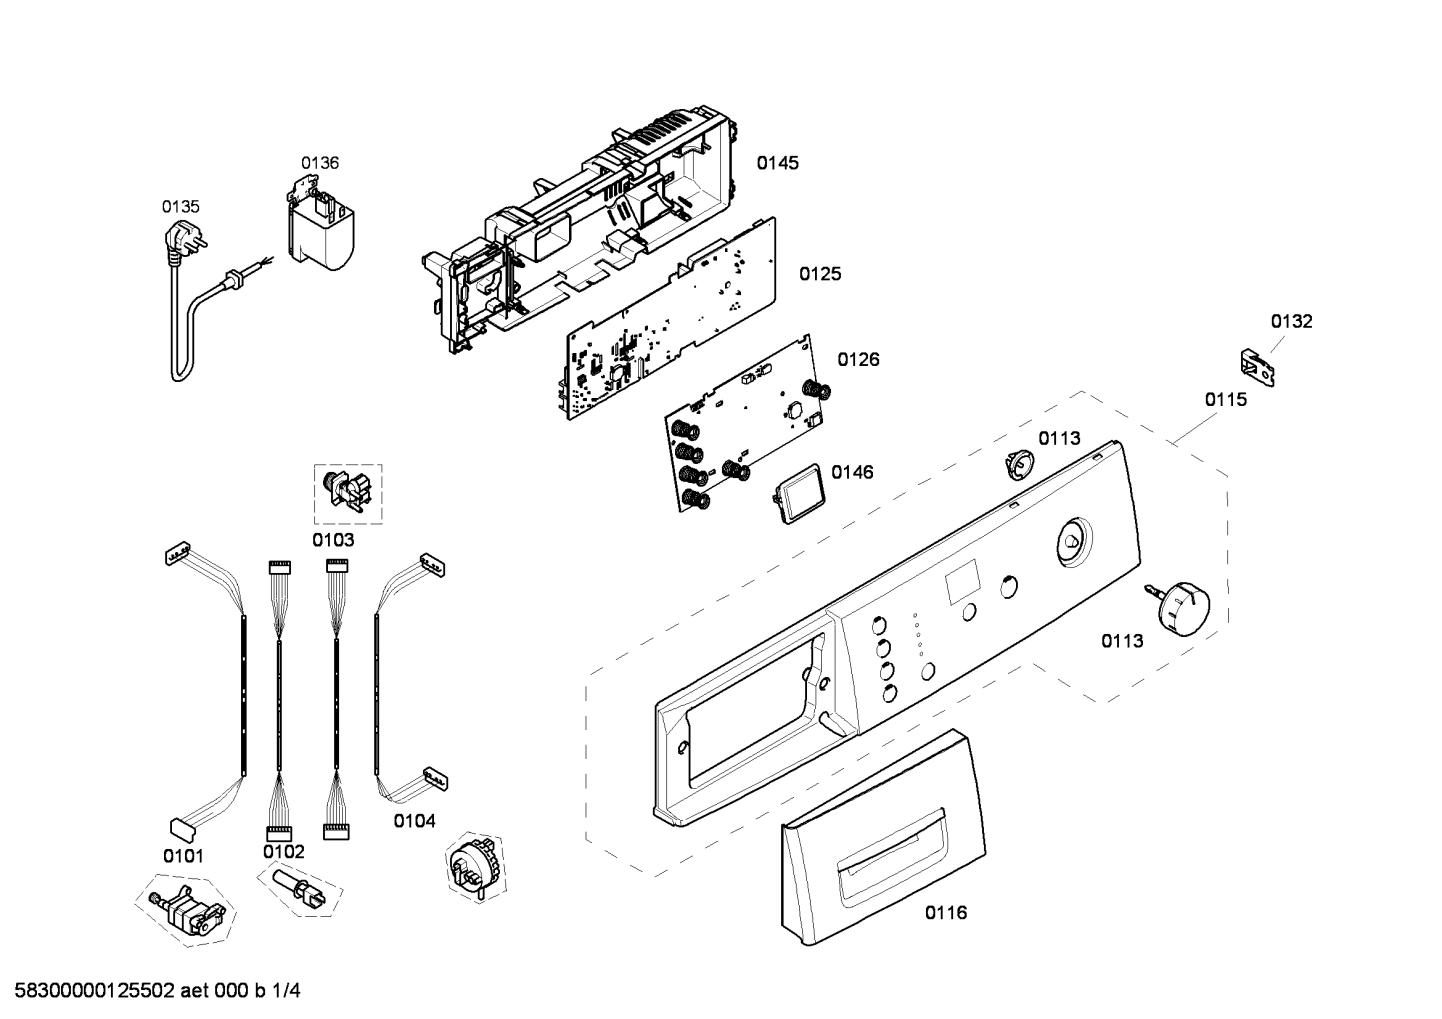
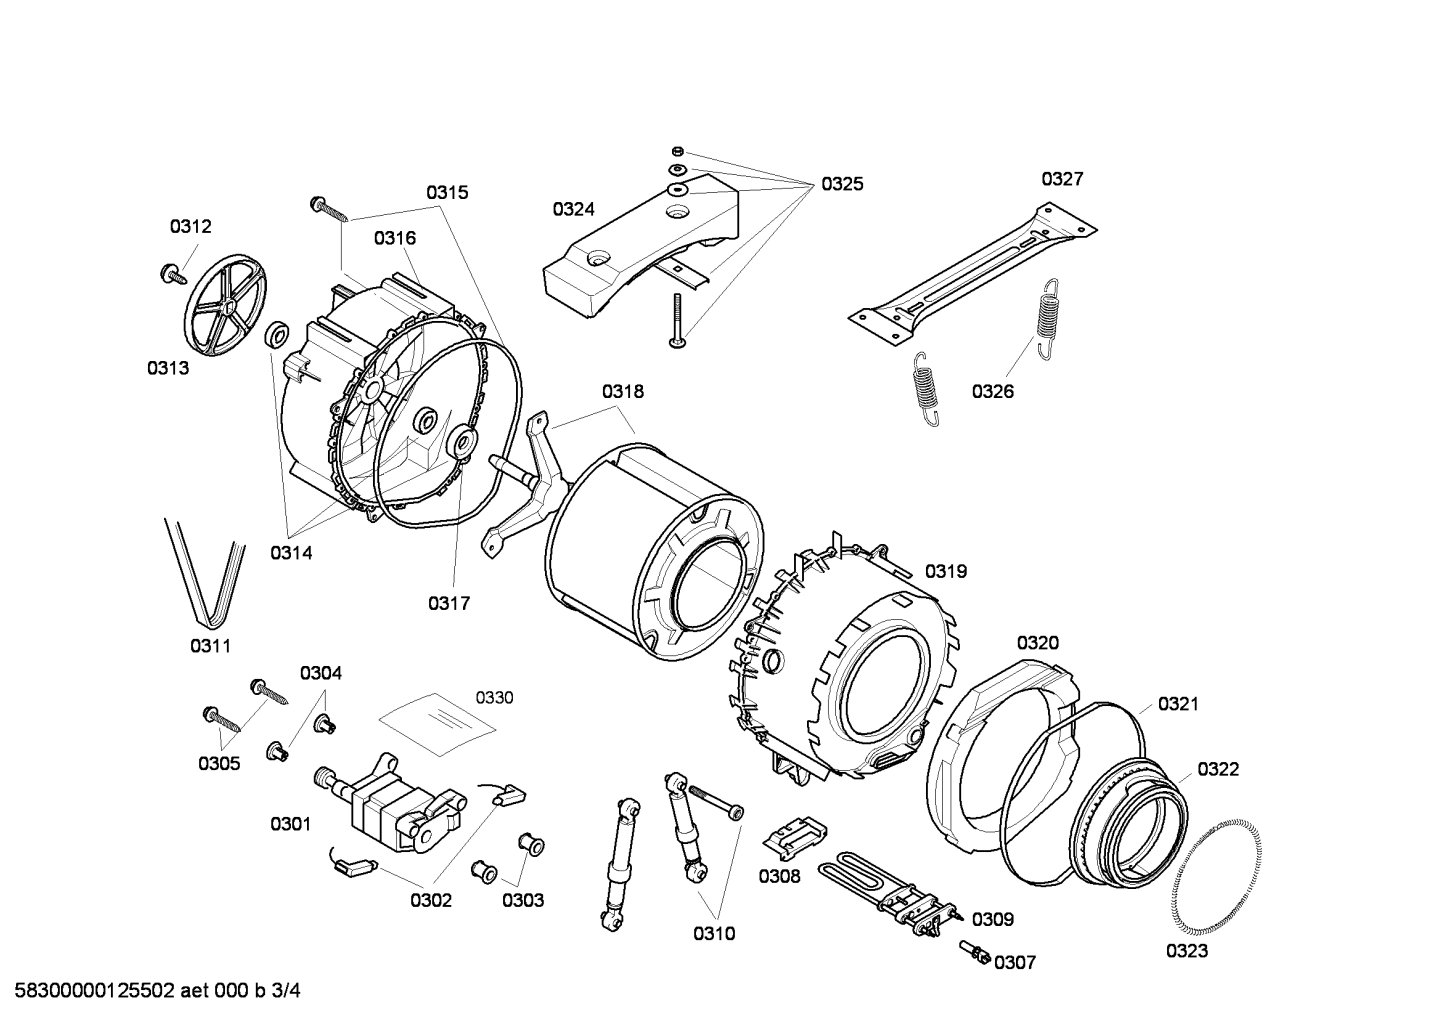
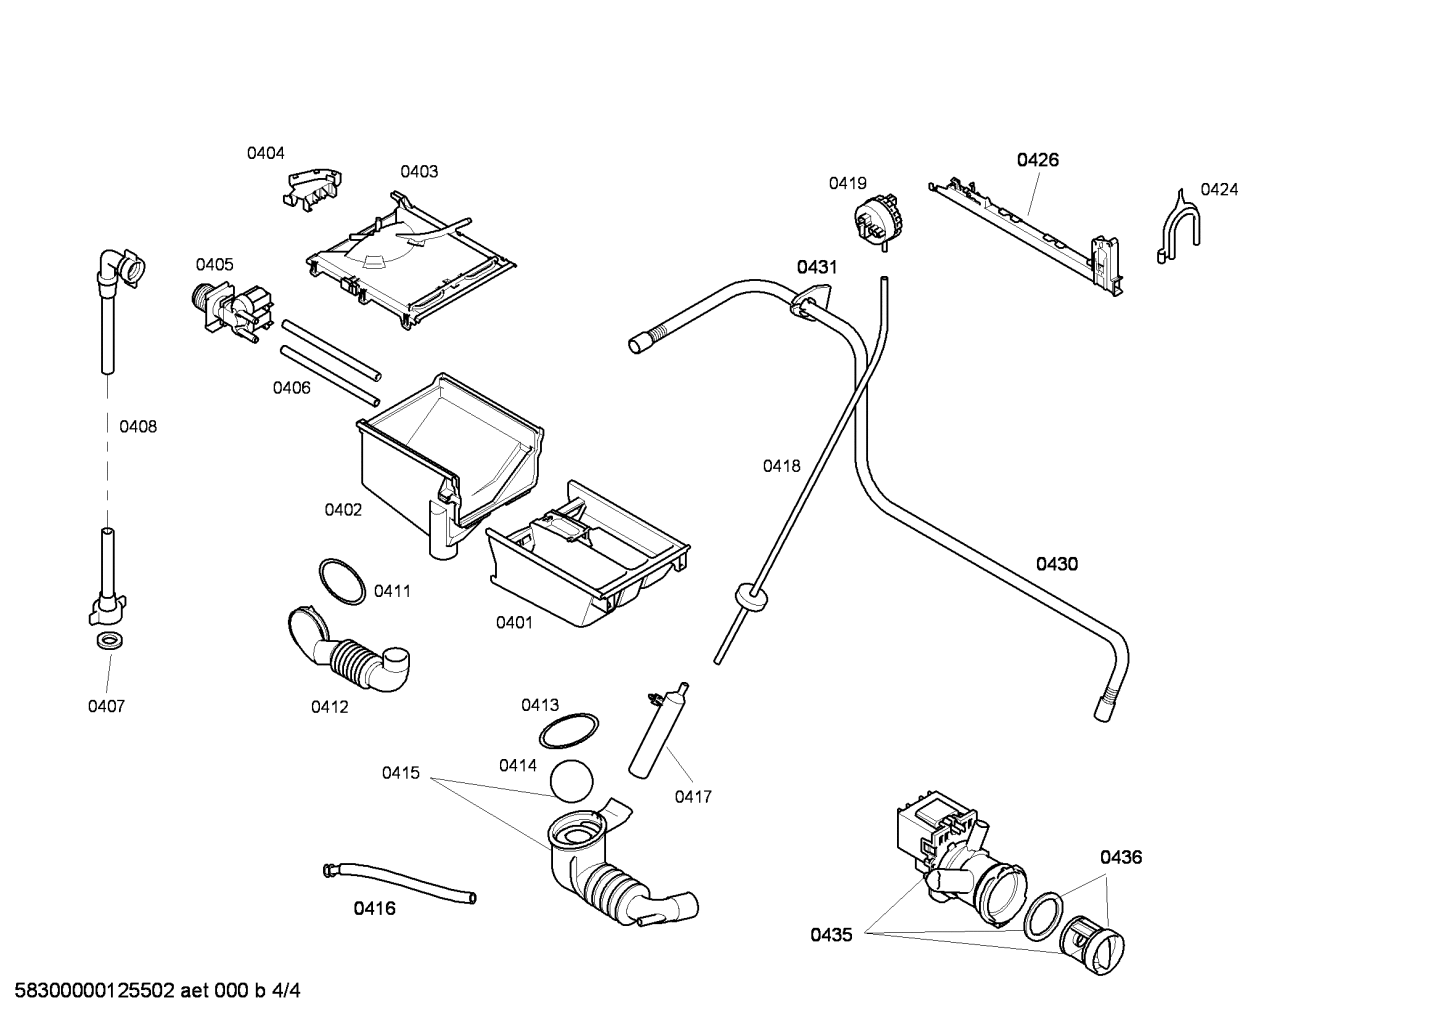
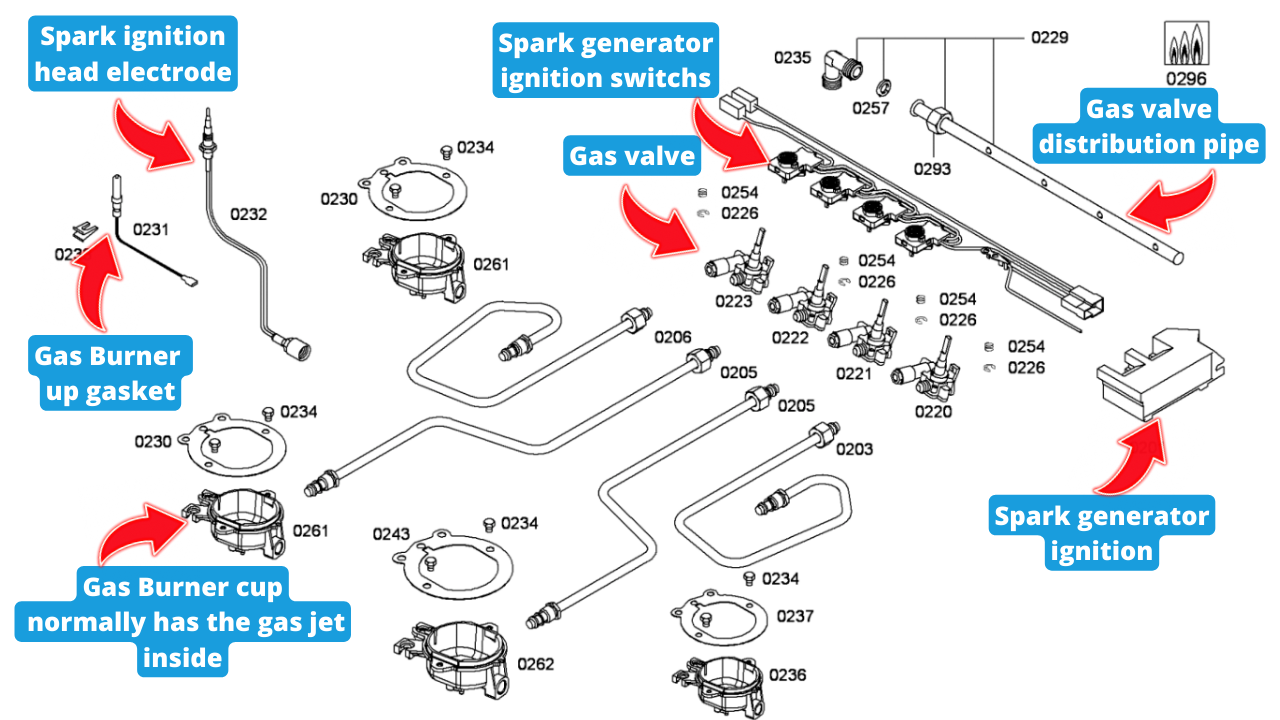
Parts list for Bosch WAE24364gb/19 washing machine 6KG WM WHITE